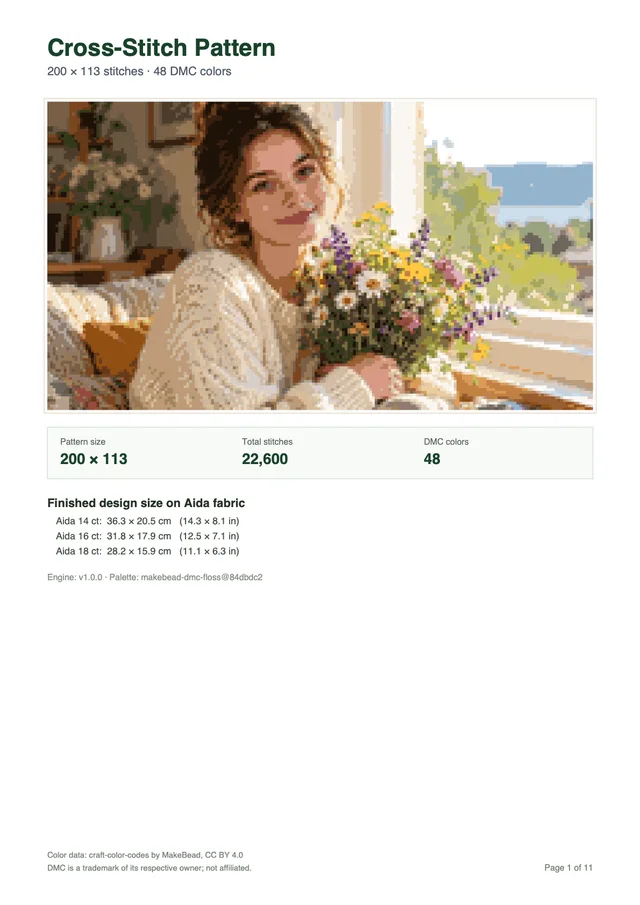
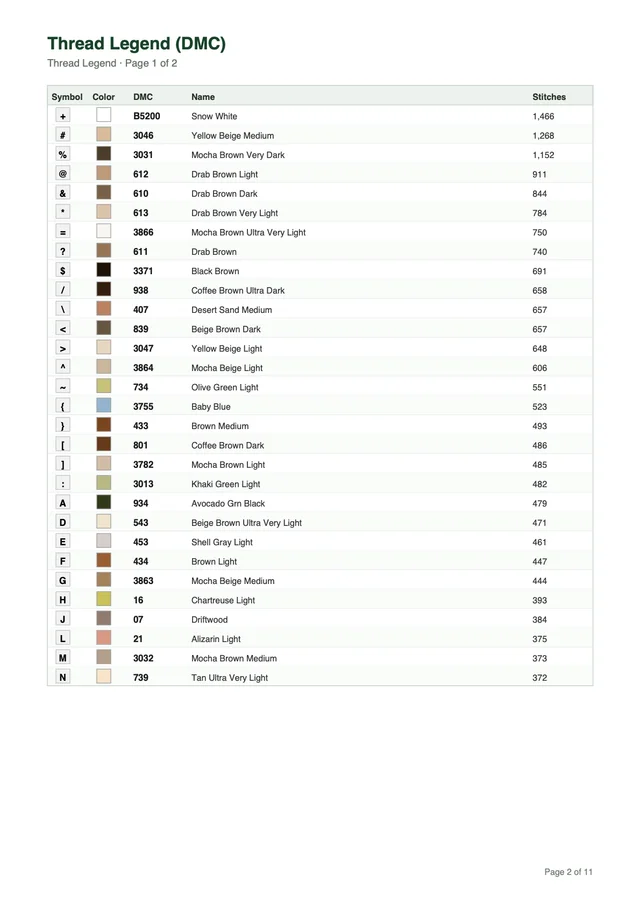
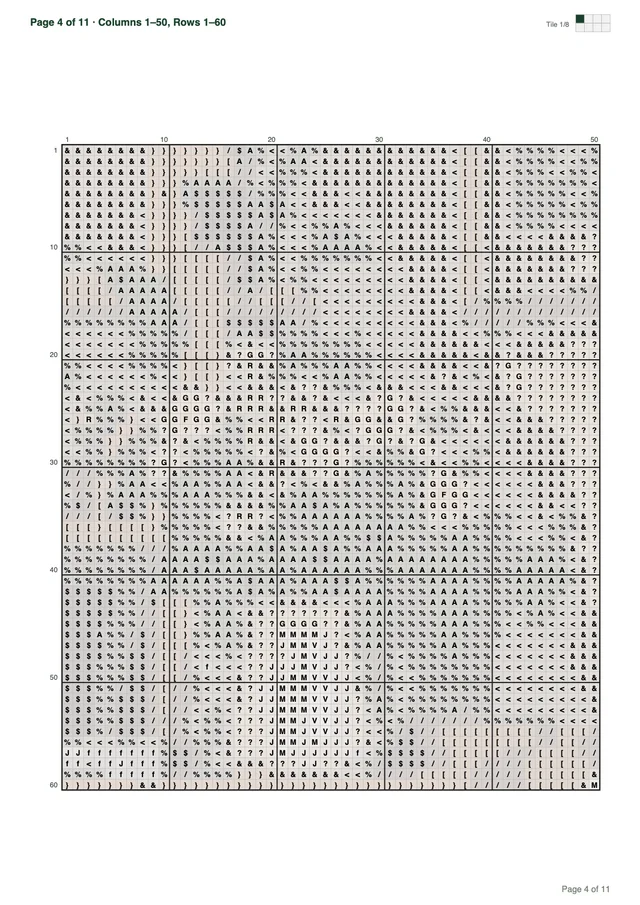
Learning how to make a cross stitch pattern gives you complete creative control over your finished needlework. Rather than searching craft store aisles for pre-printed kits that match someone else’s taste, creating your own chart lets you stitch family portraits, beloved pets, memorable vacation scenes, or original digital artwork.
Every counted embroidery chart functions as a structured coordinate map. Each colored square on your chart represents one full cross on woven cloth, and an accompanying floss legend connects each printed symbol to a specific spool of stranded cotton thread. Below, we walk through the complete chart creation process, evaluate the three primary drafting methods, and show you how to scale designs up or down without losing clarity.
Step-by-step guide: how to make a cross stitch pattern
To make a counted cross stitch pattern from an image, you translate visual artwork into a grid of colored squares matched to embroidery thread. Whether you work with digital camera photos, hand-drawn sketches, or pixel art, following an orderly workflow ensures your printed chart remains clear, accurate, and enjoyable to work.

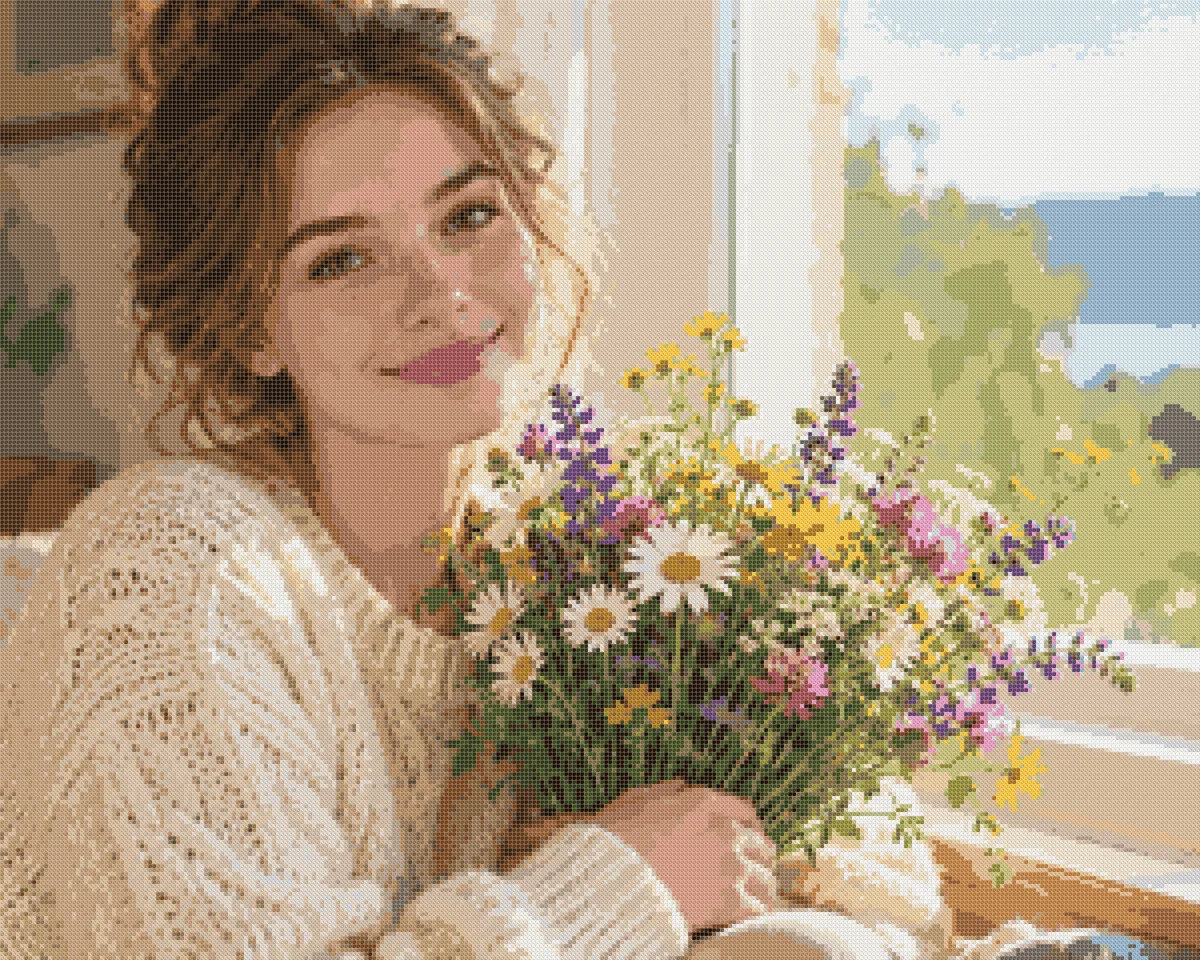
Step 1: Choose and prepare your source image
Start by selecting an image with distinct contrast, balanced lighting, and a clear focal subject. High-resolution photographs with strong edges convert far better than blurry or low-light snapshots because edge clarity defines where one thread shade ends and the next begins.
Crop tightly around your subject before converting your image. Eliminating cluttered background elements like distant trees, parked vehicles, or busy wallpaper directs every available square toward the subject that matters. If you plan to convert complex portraits or group pictures, explore our specialized guide on converting photos to cross stitch patterns for advanced lighting suggestions.
Step 2: Determine your finished dimensions from fabric count
Calculate your target embroidery dimensions early so your finished piece matches standard commercial picture frames. Fabric count indicates the number of woven squares per linear inch of cloth, which dictates how large each physical cross will appear.
To determine finished size in inches, divide your grid count by your fabric thread count:
- Finished width (in) = grid width in squares ÷ fabric count
- Finished height (in) = grid height in squares ÷ fabric count
For example, a chart measuring 140 squares wide by 105 squares high produces different finished dimensions depending on your chosen material:
- Aida 14 count: 140 divided by 14 yields 10.0 inches wide by 7.5 inches high (25.4 × 19.1 cm).
- Aida 16 count: 140 divided by 16 yields 8.75 inches wide by 6.56 inches high (22.2 × 16.7 cm).
- Aida 18 count: 140 divided by 18 yields 7.78 inches wide by 5.83 inches high (19.8 × 14.8 cm).
Always add two to three inches (5 to 8 cm) of blank fabric border around each side of your calculated dimensions. These extra margins provide room for securing your cloth inside an embroidery hoop and stretching it over mounting boards during framing.
Step 3: Establish your stitch grid dimensions
Set the horizontal width of your grid to establish project resolution and total workload. More squares produce sharper detail, smoother curves, and finer gradations, but they also require substantially more crafting hours.
Our browser application offers quick grid width presets of 50, 80, 100, 150, and 200 squares, along with a custom slider spanning 10 to 300 squares up to a platform limit of 90,000 total stitches:
- 50 to 80 squares wide: Perfect for small weekend projects, bookmarks, greeting cards, and nursery ornaments (2,500 to 6,400 total crosses).
- 100 to 150 squares wide: The most popular range for framed home decor and gifts, rendering recognizable facial features while remaining manageable (10,000 to 22,500 crosses).
- 200 to 300 squares wide: Suited for detailed heirloom wall hangings and large framed keepsakes with complex color gradients.
Step 4: Limit your color palette to eliminate confetti stitching
Restrict your color count to avoid confetti stitching, which occurs when isolated single crosses scatter across your cloth and force frequent thread changes. A tight, well-chosen color palette speeds up your embroidery rhythm and keeps solid color fields clean.
Graphic logos and typographic quotes often need only 5 to 15 shades. Landscapes, pet portraits, and family snapshots typically look vibrant with 25 to 45 colors. Our tool provides convenient color presets of 10, 20, 30, 40, and 50 shades, or custom selection from 2 to 50 colors, merging adjacent color clusters to keep your floss list practical.
Step 5: Map colors to standard DMC embroidery floss
Match each clustered pixel color to standardized six-strand cotton embroidery thread using perceptual color science. Simple mathematical RGB distance calculations produce inaccurate results because the human eye perceives green and yellow variations more vividly than equivalent shifts in dark blue.
Our generator converts image pixels into the CIELAB color space and applies the CIEDE2000 color difference formula against 489 DMC colors from the MakeBead dmc-floss dataset, licensed under Creative Commons CC BY 4.0.
In our test of 11 local sample photos (portraits, pets, and transparent images) at 100 stitches wide with 30 max colors, the mean CIEDE2000 error ranged from 1.8 to 6.8 per image. Each calculation finished in ≤47 ms in Node. Our test also highlighted a physical limitation: vivid saturated blues exceed the physical dye range of standard cotton floss, where the nearest available DMC thread sits at roughly ΔE00 ≈ 8. Duplicate DMC matches merge automatically into a single thread code.
Step 6: Assign high-contrast symbols and generate a floss legend
Assign a unique black-and-white symbol to every DMC color in your project so the chart remains readable under natural room lighting. Symbols must be visually distinct: placing open circles next to solid dots or plus signs next to minus signs creates confusion during long embroidery sessions.
A comprehensive pattern legend links every symbol on the grid to its physical materials. Your legend must display:
- Pattern symbol: The distinct glyph displayed on the chart grid.
- Thread swatch: The visual color representation for easy reference.
- DMC color code: The official numerical identifier to purchase skeins at craft retailers.
- Floss color name: The standard industry description of the shade.
- Stitch count and percentage: The exact number of crosses and share of the total project.
Step 7: Format tiled chart pages with 10×10 grid lines
Format your pattern across multiple tiled pages with bold grid lines every 10 squares to simplify counting. Trying to view a 200-stitch design on a single printed sheet forces symbols to become microscopically small and invites counting mistakes.
High-quality PDF charts include coordinate numbers along page margins, shaded overlap rows between adjacent pages, and an overview minimap indicating where each page fits within the master design. Our printable PDF patterns divide your chart into comfortable pages formatted for standard Letter or A4 paper.
Step 8: Print your PDF pattern and verify the chart
Print your complete PDF document on clean white paper and inspect the symbol grid before making your first stitch. Check that symbols appear sharp, grid coordinates are legible, and your thread shopping list contains all required floss codes.
Test the chart by locating the center coordinates marked by directional arrows along the top and left page borders. Starting your embroidery from the physical center of the cloth prevents running out of margin on any edge.
Manual graph paper vs desktop software vs browser tools
Choosing the right method to design a counted embroidery chart depends on your design complexity, time budget, and technical comfort. Crafters historically drafted charts by hand on gridded sheets, but modern digital alternatives offer speed and color precision.
The table below contrasts the three primary pattern creation methods across setup time, image handling, floss matching, and overall convenience:
| Feature or criteria | Manual graph paper | Desktop software | Cross Stitch browser tool |
|---|---|---|---|
| Initial setup time | None; ruler and pencils | 15–45 minutes installation | Instant; opens in browser |
| Image conversion | Manual tracing or light box | Automated import engine | Automated client-side engine |
| Floss color matching | Eyeball estimate from chart | Palette matching libraries | CIEDE2000 to 489 DMC colors |
| Editing individual stitches | Erase and redraw by hand | Click-by-click pixel editing | Crop, width, and color sliders |
| PDF export format | Manual photocopy or scan | Configurable print dialog | Tiled Letter and A4 PDF export |
| Best suited for | Simple motifs, text, borders | Complex manual backstitching | Photos, portraits, keepsakes |
Method 1: Traditional hand-drawn graph paper
Drafting a DIY cross stitch pattern manually on graph paper provides a tactile, hands-on crafting experience. You tape your reference sketch or photo behind transparent graph paper on a lightbox, outline primary shapes with a fine pen, and shade individual squares with colored pencils.
This approach works wonderfully for small geometric borders, a monogram cross stitch pattern, simple holiday ornaments, and custom lettering such as handwriting to cross stitch. However, drafting a photorealistic design or multi-tone portrait by hand takes dozens of hours. Manually matching fifty pencil shades to commercial embroidery skeins introduces human color guessing that often clashes when worked on fabric.
Method 2: Dedicated desktop software programs
Desktop embroidery applications like PCStitch, WinStitch, and MacStitch provide extensive editing suites for professional chart designers. These desktop programs allow crafters to place half stitches, draw delicate backstitch contours, insert French knots, and adjust single pixels by hand.
The disadvantage of desktop software lies in software licensing costs, platform installation barriers, and complex user interfaces with steep learning curves. Many needlecrafters find these dense toolbars overwhelming when they simply want to convert a personal photograph into a clean, printable DMC pattern.
Method 3: Instant in-browser pattern generation
Web-based pattern makers like Cross Stitch process your photographs directly inside your web browser without requiring software installations or account downloads. You drag and drop your photo, crop the frame, adjust stitch width and color count sliders, and watch the interactive artwork and symbol chart update instantly.
Our generator computes the pattern on your local device, matches your image colors against the complete DMC thread catalog using CIEDE2000 math, and produces multi-page PDF documents ready for printing. For needlecrafters deciding between designing their own pattern or paying third-party makers, our comparison of custom cross stitch patterns explores time and cost trade-offs in detail. If your project features family members, review our specific guide on portrait cross stitch patterns to capture delicate facial skin tones cleanly.
How to make a cross stitch pattern bigger or smaller
You can resize a counted embroidery chart by either switching your fabric count or adjusting the grid width in stitches. Understanding the difference between physical scaling on cloth and digital grid rescaling ensures your embroidery matches your intended display frame, room decor, or personalized hoop presentation.
Method 1: Changing fabric count without modifying the chart
Changing fabric count alters the finished physical size of your needlework without modifying a single symbol on your chart. Because each fabric count packs a different number of squares into every square inch, the identical pattern stitches up larger on loose fabric and smaller on tight fabric.
The table below shows how a single 120 × 90 square pattern scales physically across standard Aida fabrics:
| Fabric type and count | Squares per inch | Finished width | Finished height | Recommended fabric cut (with 3 in margins) |
|---|---|---|---|---|
| Aida 11 count | 11 | 10.91 in (27.7 cm) | 8.18 in (20.8 cm) | 16.9 × 14.2 in (43 × 36 cm) |
| Aida 14 count | 14 | 8.57 in (21.8 cm) | 6.43 in (16.3 cm) | 14.6 × 12.5 in (37 × 32 cm) |
| Aida 16 count | 16 | 7.50 in (19.1 cm) | 5.63 in (14.3 cm) | 13.5 × 11.6 in (34 × 30 cm) |
| Aida 18 count | 18 | 6.67 in (16.9 cm) | 5.00 in (12.7 cm) | 12.7 × 11.0 in (32 × 28 cm) |
| Aida 22 count | 22 | 5.45 in (13.8 cm) | 4.09 in (10.4 cm) | 11.5 × 10.1 in (29 × 26 cm) |
If you want your pattern to finish 22% smaller without re-charting anything, simply switch from 14-count Aida to 18-count Aida. If you find counting small stitches difficult on your eyes, move from 14-count Aida to 11-count Aida to increase finished dimensions by 27%.
Method 2: Rescaling stitch dimensions in the pattern maker
Rescaling stitch width alters the total number of squares on your grid, modifying resolution and crafting time. When you increase the stitch width in our pattern maker from 100 stitches to 150 stitches, the software re-samples the source photo, adding 125% more crosses to capture finer facial expressions, petal textures, or fur markings.
Conversely, reducing stitch width from 100 stitches down to 80 stitches cuts total stitch count by 36%, creating a faster project with bolder, stylized color blocks. For pet pictures with intricate coat patterns, consult our guide to pet portrait cross stitch patterns to determine whether a higher stitch count is necessary for your pet’s fur.
Qualitative thread estimation: understanding floss requirements
Rather than offering arbitrary skein predictions that mislead crafters, our pattern generator displays the exact stitch count and percentage share for every DMC color in the legend table. Experienced needlecrafters know that thread usage varies depending on individual stitching tension, hoop waste, thread travel across back fabric, and floss strand thickness.
Use the legend’s stitch counts and percentages as your practical buying guide:
- Accent and detail shades: Colors that represent only a minor fraction or small percentage of your project need just one standard skein, leaving plenty of thread for starting tails and finishing knots.
- Dominant and background colors: Shades that represent a large percentage share of total crosses will consume multiple skeins, so prioritize purchasing extra skeins of those specific DMC numbers to ensure dye-lot consistency.
- Stitching tension and travel: If you tend to carry working threads across empty areas on the back of your fabric, budget additional floss for those secondary shades compared to tight, efficient crafters.
Essential preparation checklist before you begin
Before threading your needle and pulling your first length of floss, following a structured preparation routine prevents common counting mistakes, fabric fraying, and thread tangles. Review these five practical preparation steps to set up your crafting station for a smooth stitching experience:
- Calculate fabric cut with framing borders: Measure finished pattern dimensions and add at least two to three inches of blank border on every edge.
- Match needle size to your fabric count: Use blunt embroidery needle size 24 for 14-count Aida, size 26 for 16-count and 18-count Aida, and size 28 for fine 22-count fabric.
- Organize floss by numerical DMC code: Label bobbins or thread cards with your project’s DMC numbers to match the chart legend quickly.
- Locate fabric center before stitching: Fold your fabric in half vertically and horizontally to find the central intersection, matching the center arrows on your chart.
- Download your pattern and organize materials: Before threading your needle, sign up with Google to download your complete printable PDF chart and learn how to make a cross stitch pattern with ease.