How a house portrait cross stitch is charted from a facade photo
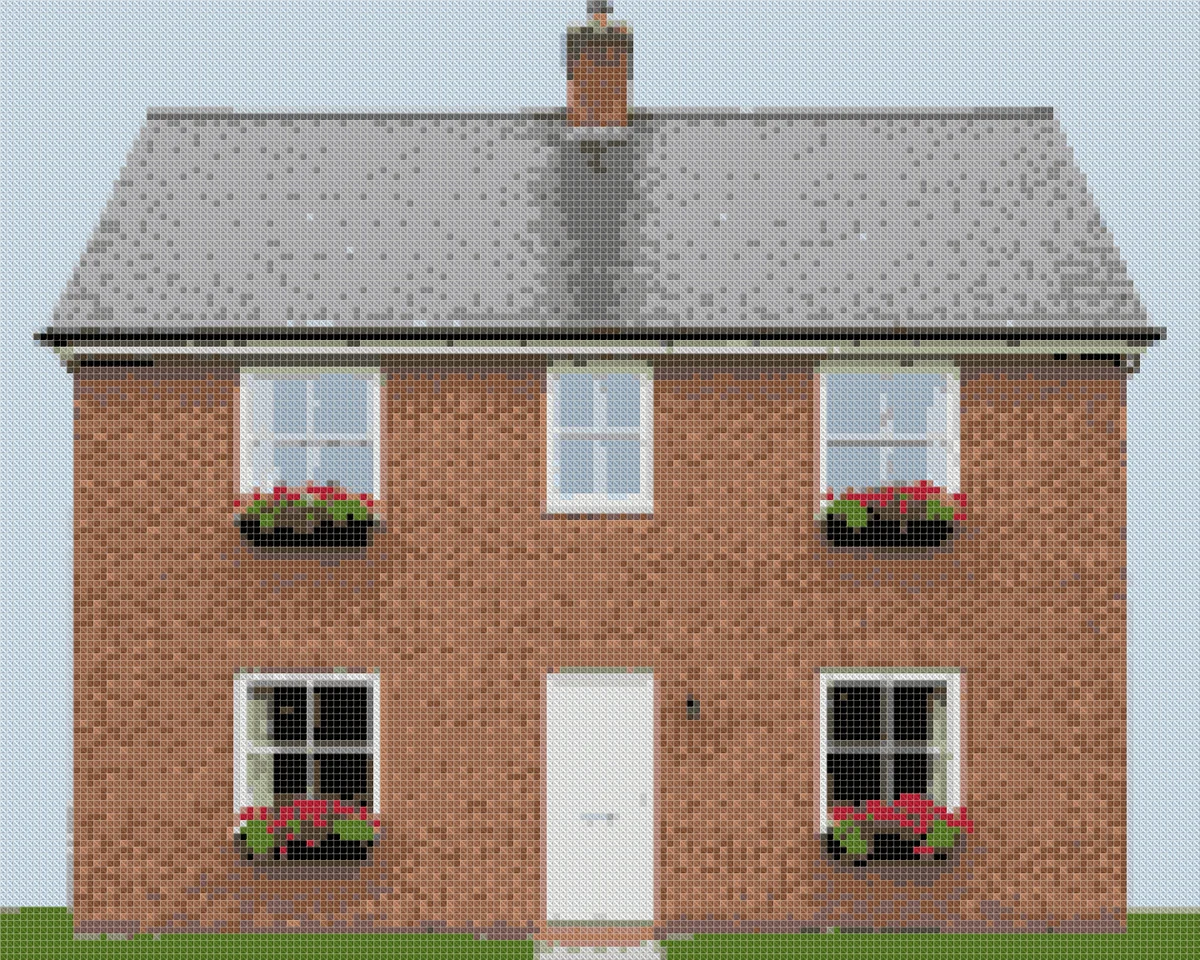
A house portrait cross stitch translates a facade photo into counted stitches with DMC thread. Stitchers can sign up on our website to turn building pictures into charted embroidery.
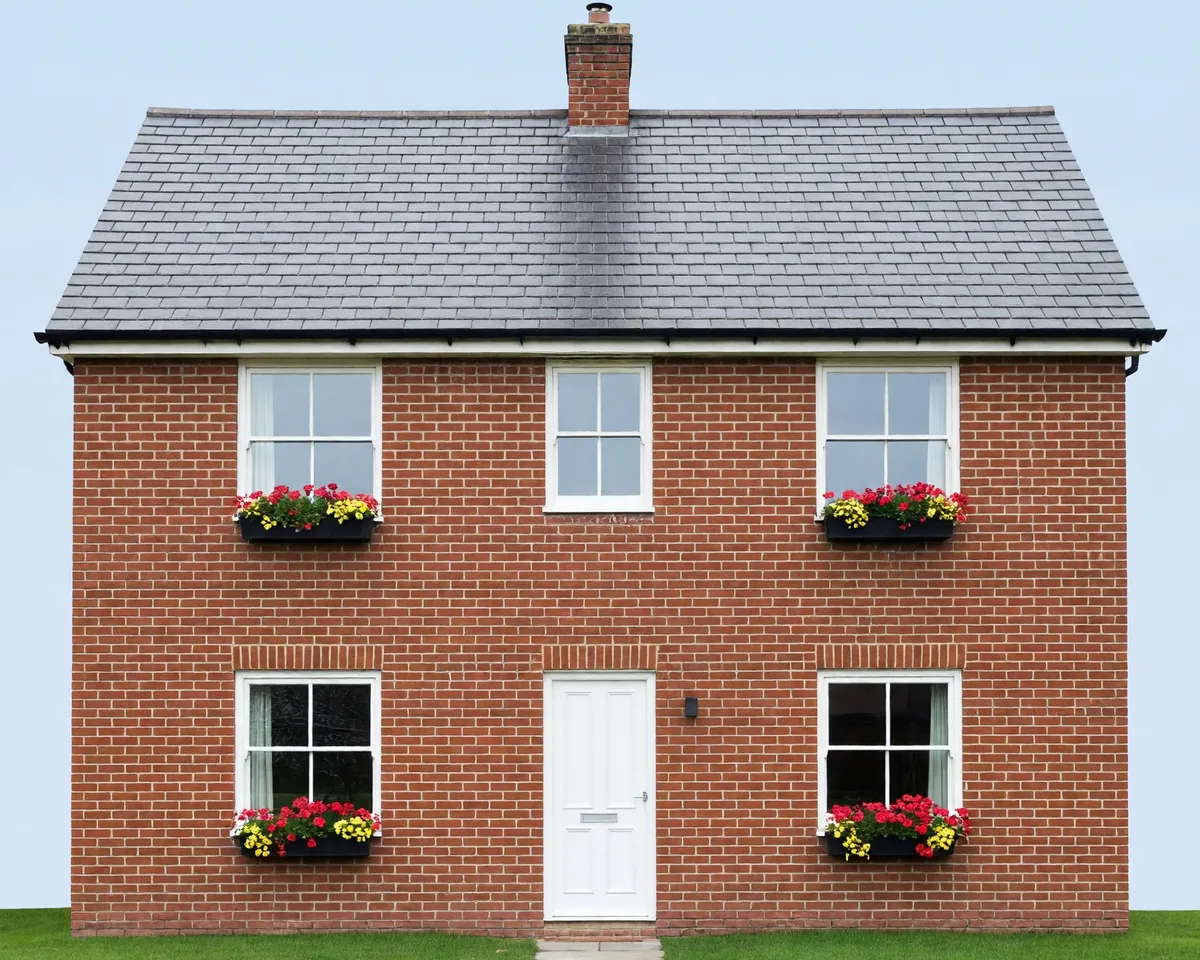
Turning a home photograph into counted needlework begins with a digital image of the building exterior. The Cross Stitch pattern maker reads your uploaded photo file and maps every architectural feature onto a rectangular stitch grid. Front porches, brick steps, window panes, and roof shingles convert directly into individual color squares. Rather than guessing thread matches by eye, the system converts every tone into standard embroidery floss.
Our browser converter accepts standard digital image files up to 20 MB and 8,000 pixels per side. You can upload photos in JPEG, PNG, or WebP format straight from your phone or camera storage. The interactive preview runs right inside your browser window without uploading raw files to an external queue. This fast feedback lets you test different crops and dimensions before generating your final project file.
Selecting the right grid width represents the most critical decision when planning your embroidery project. The Cross Stitch pattern maker provides width presets of 50, 80, 100, 150, and 200 stitches across. You can also specify any custom width between 10 and 300 stitches, capped at a maximum of 90,000 total stitches. Choosing a width between 120 and 200 stitches usually produces the most satisfying balance for residential facades.
Architectural portraits need sufficient grid density to keep straight structural lines clean and crisp. When a pattern is set under 100 stitches wide, thin window muntins and porch posts can blur together into muddy blocks. Setting your width to 150 or 180 stitches gives each window several grid cells, maintaining distinct glass panes and painted trim. Siding boards and roof shingles also retain their horizontal lines instead of dissolving into random pixel clusters.
Every chart generated by the maker consists purely of counted full cross stitches. The software does not export backstitch outlines, French knots, or fractional quarter stitches. Many traditional house embroidery samplers rely on thin backstitch lines to define delicate railings or roof edges. In our counted format, clean resolution replaces backstitching by giving small details enough squares to resolve on their own.
Working with a pure cross stitch grid keeps the stitching process relaxing and predictable. You do not need to split fabric threads with sharp needles or guess awkward partial stitches across woven squares. Standard blunt cross stitch needles slide easily through the open holes of Aida cloth. If you want to explore general picture conversion techniques, check out our guide on photo to cross stitch pattern design.
Before producing your printable chart, the browser workspace lets you inspect both visual and symbolic pattern previews. You can zoom in on individual windows, review color boundaries, and ensure the building silhouette looks crisp. If you prefer to experiment with custom dimensions or floss counts for special projects, review our custom cross stitch pattern options. This interactive review ensures complete confidence before you begin threading your needle.
Photo angle, crop, and the words the maker will not add
Photograph the facade straight-on in daylight and crop out distractions before uploading. The Cross Stitch pattern maker converts your pixels into stitches but never adds lettering, fonts, or names.
Achieving an attractive architectural embroidery piece starts with careful camera positioning. A straight-on perspective taken parallel to the front door produces clean vertical walls and level rooflines. When you snap a picture from a sharp corner angle, perspective distortion makes rectangular windows skew into irregular polygons. Looking up from street level also compresses upper stories and exaggerates the eaves.
Lighting conditions play an equally significant role in the clarity of your finished chart. Diffused morning light or bright overcast skies provide even illumination across all exterior surfaces. Harsh midday sun casts deep black shadows under porch awnings, soffits, and window sills. Those dark patches force the converter to assign heavy charcoal threads where bright architectural paint belongs.
The Cross Stitch pattern maker does not provide automated background removal during conversion. Every pixel captured inside your cropped frame converts into real stitches on your cloth. If you leave wide expanses of driveway, lawn, and sky in the frame, your chart allocates valuable thread count to empty asphalt. Cropping tightly around the exterior walls and roof ridge ensures that every stitch depicts the building.
Before you upload your picture, prepare your composition with a few simple photography steps. Taking five minutes to stage your photo saves hours of unpicking stitches later on.
- Capture the main facade straight-on at eye level to keep siding boards and window frames parallel.
- Photograph the exterior on a bright overcast morning to prevent harsh shadows beneath roof overhangs.
- Frame the house so exterior walls fill the majority of the viewable image area.
- Move parked cars, trash bins, and garden hoses away from the front elevation before shooting.
- Crop tightly along the roof ridge and foundation line to minimize background sky and driveway stitches.
Many stitchers hope to include phrases like Home Sweet Home, family surnames, or house dedication dates. The Cross Stitch pattern maker focuses strictly on translating image pixels into counted squares. It does not type text, pick fonts, draw floral frames, insert names, or build avatars. The system never injects decorative typography or script banners into your design.
If you want meaningful words bordering your house embroidery, you have two practical methods available. You can add your chosen lettering directly onto your digital image using photo editing software before uploading the file. Alternatively, you can stitch the building as charted and map your motto separately using our cross stitch quote pattern guide. Stitching words from an alphabet chart keeps text razor-sharp without relying on pixelated image typography.
Eliminating clutter around the perimeter also saves substantial stitching time and thread expense. A wide suburban yard often adds thousands of green and gray stitches that do not contribute to the character of the home. Framing the front facade snugly lets you focus your craft on decorative trim, chimney bricks, and welcoming front doors. Clean source photography yields a sharp, recognizable portrait that honors your home.
Frame sizes for a counted sweet home chart
Standard home charts fit common picture frames when you divide stitch width by fabric count. A 140 by 100 design on 14-count Aida fits an eight-by-ten frame with border margins.
Calculating the physical size of your completed needlework requires only simple arithmetic. To find dimensions in inches, divide the total stitch count across each side by your fabric count. On standard 14-count Aida cloth, 50 stitches equal 3.6 inches, 60 stitches equal 4.3 inches, and 100 stitches measure 7.1 inches. Larger projects expand accordingly, where 200 stitches measure 14.3 inches and 300 stitches reach 21.4 inches.
Selecting between 14-count and 18-count Aida significantly alters the finished scale and visual texture of your project. Working on 14-count fabric provides comfortable visibility for eyes and hands, making it ideal for relaxed evening stitching. In contrast, 18-count Aida features smaller weave squares that condense the same pattern into a finer, more compact display. High-count fabrics blend architectural color steps together smoothly, giving bricks and shingles a delicate painted look.
| Stitch Dimensions | Fabric Count | Stitched Width | Stitched Height | Recommended Frame Size |
|---|---|---|---|---|
| 140 by 100 stitches | 14-count Aida | 10.0 in | 7.1 in | 11 by 14 in with mat |
| 140 by 100 stitches | 18-count Aida | 7.8 in | 5.6 in | 8 by 10 in with mat |
| 180 by 120 stitches | 14-count Aida | 12.9 in | 8.6 in | 12 by 16 in with mat |
| 180 by 120 stitches | 18-count Aida | 10.0 in | 6.7 in | 11 by 14 in with mat |
As shown in the table above, a 140 by 100 design stitched on 14-count Aida measures 10.0 inches wide by 7.1 inches high. If you work that identical 140 by 100 chart on 18-count Aida, the finished motif compresses to 7.8 inches wide by 5.6 inches high. Stepping up to 180 by 120 stitches on 14-count cloth yields 12.9 inches wide by 8.6 inches high. That same 180 by 120 pattern on 18-count fabric measures 10.0 inches wide by 6.7 inches high.
Always cut your raw fabric with ample margins beyond the stitched motif boundary. You should add 2 to 3 inches of spare fabric per side to accommodate framing, lacing, and mounting boards. Without that unworked border, securing the completed needlework around acid-free foam board becomes exceptionally difficult. Generous fabric borders also leave space for decorative matting to showcase your finished handiwork.
Many needleworkers encounter vintage home sweet home kits when searching for domestic embroidery projects online. Those commercial vintage kits typically feature generic cottage illustrations bordered by printed calico margins and stamped alphabet letters. They offer mass-produced nostalgia rather than personal meaning. In contrast, our website converts your specific family residence from an authentic photograph into an individualized chart.
Framing a custom architectural piece allows you to match the display to your interior decor. Standard store-bought frames in dimensions like 8 by 10 inches or 11 by 14 inches work well when paired with custom-cut mats. A custom mat opening highlights the building facade while covering unstitched fabric margins. If you want practical advice on mounting cloth and finding fabric center points, read our guide on how to make a cross stitch pattern.
Displaying your finished piece in an entryway or family room creates a warm conversational centerpiece for visiting guests. The handmade texture of cotton floss on woven cloth offers tactile charm that standard framed photographs cannot match. Whether celebrating a first home purchase or commemorating a family farmhouse, proper fabric sizing ensures your keepsake fits its frame beautifully. Careful planning at the start protects your investment of stitching hours.
Colors, confetti, and the PDF
Choosing 20 to 40 DMC colors keeps building details distinct while controlling isolated stitches. The generated PDF includes symbol charts, coordinates, and an exact thread shopping list.
Managing thread colors represents a key technical challenge in counted needlework. The Cross Stitch pattern maker offers quick color presets of 10, 20, 30, 40, and 50 shades. You can also specify any custom palette limit between 2 and 50 DMC colors. Setting your palette to 150 to 300 threads is intentionally not supported, as extreme color counts overwhelm stitchers with endless thread swapping.
Our color matching engine operates in CIELAB color space using the CIEDE2000 color difference formula. It maps every pixel against 489 six-strand cotton shades from the MakeBead dmc-floss dataset. Image reduction combines Median Cut and k-means clustering to find optimal palette clusters while eliminating duplicate floss assignments. This mathematical pairing produces authentic thread equivalents for masonry, clapboard siding, and weathered shingles.
The algorithmic color pipeline was tested across 11 local photos at 100 stitches wide and 30 max colors. In benchmark runs, execution completed in at most 47 milliseconds in Node with an average CIEDE2000 delta between 1.8 and 6.8. Saturated cyan sky tones can sit about 8 Delta E from vibrant screen blue due to physical dye limitations. However, earthy building materials like red brick, limestone mortar, and slate roofing convert with exceptional fidelity.
Stitchers should understand how the system treats confetti stitches across large uniform surfaces. The pattern maker features no dithering toggle and no confetti eraser. Confetti occurs when single, isolated stitches scatter across an otherwise solid background, creating peppered noise that complicates counting. Because our converter avoids dithering, exterior siding walls render in clean, coherent color blocks.
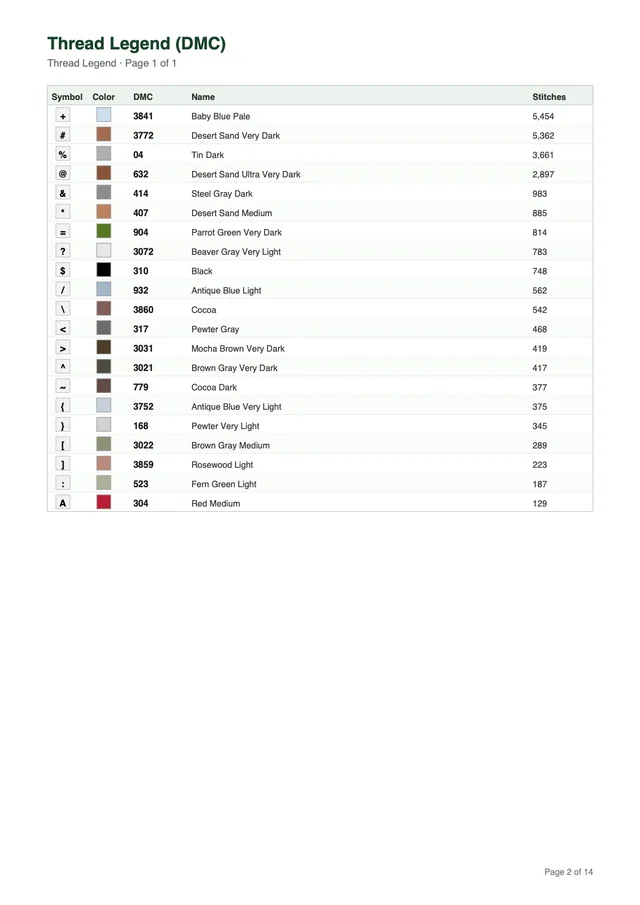
Deep architectural shadows and dark window glass naturally resolve into rich charcoal and black tones. The converter frequently assigns DMC 310 for black to delineate recessed doorways, wrought iron porch railings, and dark shutters. Having deep contrast anchors the lighter siding and trim colors, giving the charted building physical weight on cloth. Clear tonal separation ensures your finished work reads as a dimensional structure rather than a flat silhouette.
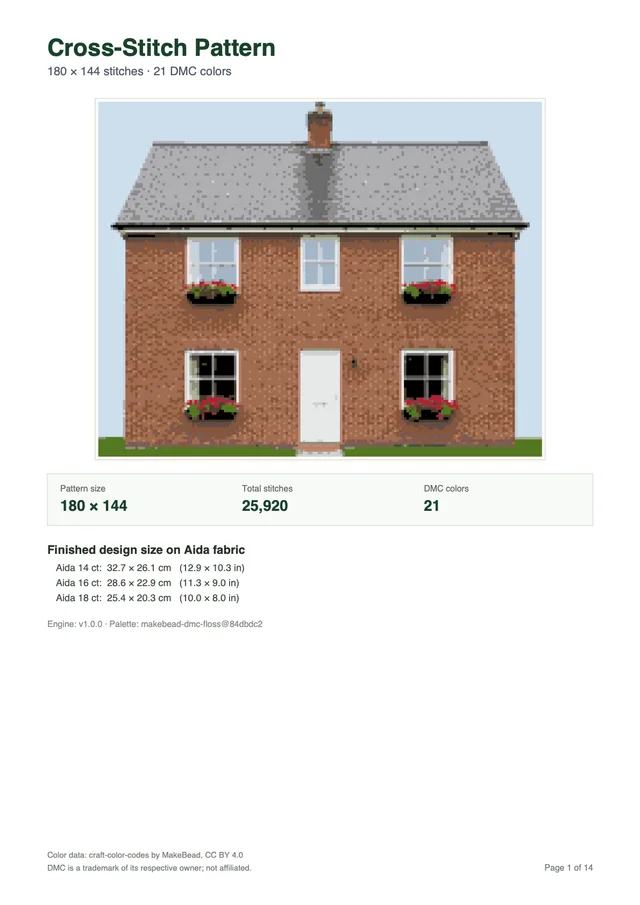
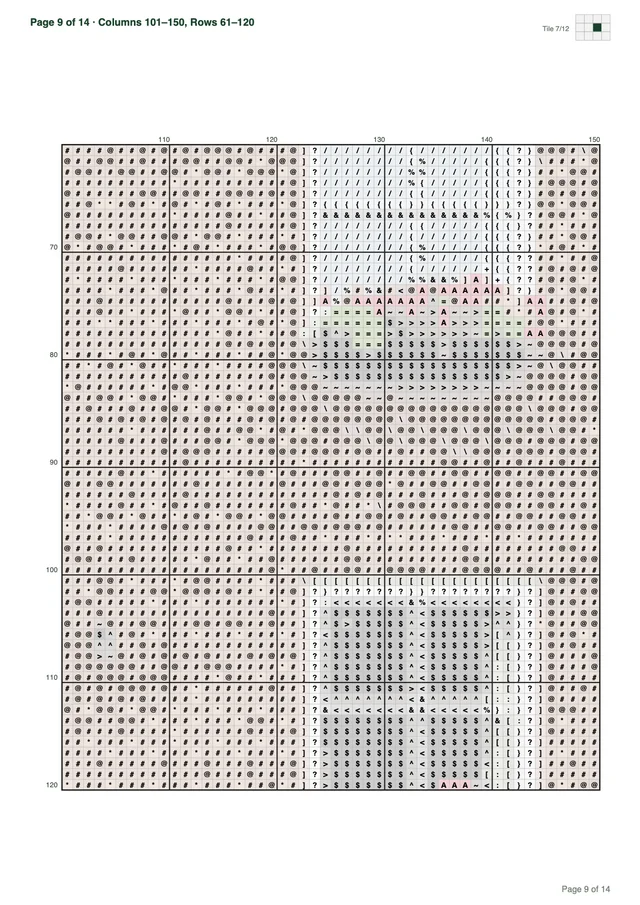
Once you finalize your interactive preview, our website exports a professional multi-page PDF document. You can download the chart formatted for either standard Letter or international A4 paper. Every PDF includes a polished cover sheet, full dimensions, and a comprehensive DMC floss legend with symbol keys. Chart tiles measure 50 stitches wide by 60 tall, featuring bold grid lines every 10 stitches, outer edge coordinates, and a visual page minimap.
Consider the sample pattern above, measuring 180 by 144 stitches with 21 colors, which formats into a 14-page printable document. Each chart page provides generous overlap and crisp high-contrast symbols to minimize counting strain. When you create an account with Google, you receive 3 free credits to begin your projects. Generating a new PDF pattern costs 1 credit, while subsequent repeat downloads of that exact PDF cost nothing.
Transforming personal memories into a house portrait cross stitch produces a timeless family heirloom. You can preview thread requirements, adjust your grid, and download your complete printable PDF chart to start stitching today.